Friday, December 7, 2012

Stencil project

1. Explain how you changed your photo in the lab to create a stencil.
When we changed the contrast of the photo using photoshop. We messed with the threshold of the photo giving it the black and whit effect.
2. When creating the collage background explain your choices of colors, materials (magazine paper, books pages, etc), and placement. How does it relate to your topic? If no relation discuss general idea.
3. Discuss the way positive and negative space was used to create your stencil.
4. When using the xacto knife, explain the safety procedures, how to use the knife and any challenges you had to overcome while cutting.
5. How was your experience with the spray paint? Discuss how color choice is important, placement of stencil, and any other concepts you noticed while creating this.

Monday, October 22, 2012

Final print making

1.     Describe the overall composition of your artwork (balance, unity, rhythm and movement).
  The balance of my piece is ok. The colors look good together and make the print flow. All of the parts of the piece look like they are supposed to be there and are part of the same piece. The rythym is good because your not just looking at the same spot the whole time your eyes wander to diffrent parts of the piece.
2.     How did you add texture and contrast to your print? Is this important? Why?
I added texture to my piece by putting in the armadillos shell and the lines in the sand. It is very important to do all of this so the piece doesnt look to bland and concrete. Also it gives personality to the piece and doesnt make it boring it gives it life.  
3.     Explain how you used positive and negative space to show your image.
I used postive and negative space to represent many things on my piece. It gives it the illusion that it is in the paper almost.
4.     Describe the craftsmanship of your print. (How good the project is technically crafted
The craftsmanship of my print is not the best but it isnt horrible. It looks good but I could have used less in ink in some places and some more in other places. Like some of the lines in the armadillo are splotched together because excess ink seeped in and went onto the final print.

5.     Were you able to achieve depth by showing a foreground, middle ground and back- ground? Explain.
I was able to achieve depth because the paper looks to be endless. It seems to almost go on forever and having the cactus in the foreground helps with the illusion.
6.     Explain your experience with Printmaking. What were the obstacles and advantages?

Thursday, October 4, 2012

Print Sketch


1. Why is texture so important to have in your sketches?
Texture is important because when we copy the sketch onto the tiles the texture will pop out.
2. Why is it neccessary for you to have several references of each animal and each background? Explain.It is important because you must get what the animal looks like before you draw it and to draw the background you must understand what it looks like and get all the details.

3. When you look at your sketches are you able to see which sketch is the strongest and will make the best print? How do you know this? Yes I am able to figure out wich is the best for making the tile. I can figure this out by seeing how the textures contrast and compiment each other and by which one I think looks better.


Interactive Chalk Mural

1. Explain your experience working on a team and executing your ideas for the mural.
My experience working with a team was very fun a rewarding. Everyone had there own job and did it perfectley. When someone had a idea we used it or at least tried to but if it was really off we didnt.
2. Explain the importance of collaboration when working on a team.
  The importance of working with a team is that you have to work together. You cant branch off and start doing things without telling the others you have to work together and stay focused.
3.  How successful was this project? Explain how and why.
This project was very succesfull because I met some of the people in my class and figured out how to work on art with others.
4. Explain how you feel about creating artwork that others can interact with. Ex. Invoving the whole school?
It would be very fun but it would have alot of pressure. People would expcect alot from you and you may not please everyone.

Thursday, September 20, 2012

Value portrait


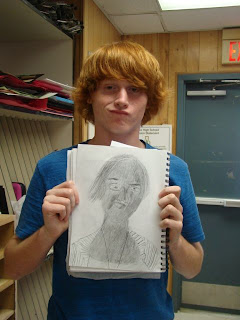
1. Explain the process you went through to develop your drawing.
First we had to take pictures as a reference to draw. Once we got the refrences we had to trace over the picture to find all of the values on the face. Once that was finished we went into our sketchbooks and made a portrait with the traced values.
2. Explain how you found the different values in the portrait?
We took the pictures of who we were going to be drawing and traced the values. We did that by going up to a window and looking at the darks and lights and tracing over the shapes we saw. Also we went back over the shapes to outline the darks.
3.  Did you achieve a full range of the different values within your portrait?  How?
Yes I did by shading the diffrent shapes. We also went over the tracing paper on the back with a pencil so it would come off on the sketch book paper.
4. Describe your craftsmanship.  Is the artwork executed and crafted neatly?
In my point of view while I was drawing I felt good. Once the final product came out I didnt feel as confident about the piece. But I do think I did the piece as neatley as I could have.
5. List any obstacles you had to overcome and how you dealt with them.
During the making of this piece I thought it was going well. In the middle of the piece I looked at it and restarted but that looked even worse than my original so when I realized that I went back. I also had the challenge of the eyes because my picture was very dark making it hard to make out the eyes.

Friday, September 7, 2012

Value Study


1. Describe your overall thoughts on the final piece.


I feel like as my first final piece of art for this class that it came out well. I do believe that I could have done better but that is what later is for.
2. if this was a group project, what was your contribution?
It was not a group project.
3. How successful do you feel this piece is and why?
I felt like I did a good job on this piece but I can definatly get better over time.
4. What worked about this project? What didn’t work?
The drawing before had worked but the blending on my piece I did not do the best I could have done.
5. If you were to do this project over again, what changes would you consider making?
I would go slower and try to blend my colors more carefully.
6. What was the most difficult part about completing this piece and why? The most difficult part was fore sure time mangement because we had alot to do and not to much time.
7. What did you learn from this piece?
I learned that I can make a piece of art that is not stick figures.